Introduction
If you're new to GW-R86S's world and looking for a device, I highly recommend starting with Patrick Kennedy's review.
I've established this repository to document the upgrade process of my GW-R86S-U1, where I'll be installing a Mellanox ConnectX-4 MCX4421A-ACQN interface.
First and foremost, let me provide you with the specifications of my GW-R86S-U1:
- CPU: Intel Celeron N5105
- Memory: 8GB
- ECC: 128GB
Original Interfaces: 3*2.5g ethernet ports + ConnectX-3 EN 10 Gigabit Ethernet CX341A
As I proceed with the upgrade, I'll be sharing detailed steps and any insights I gain through this repository.
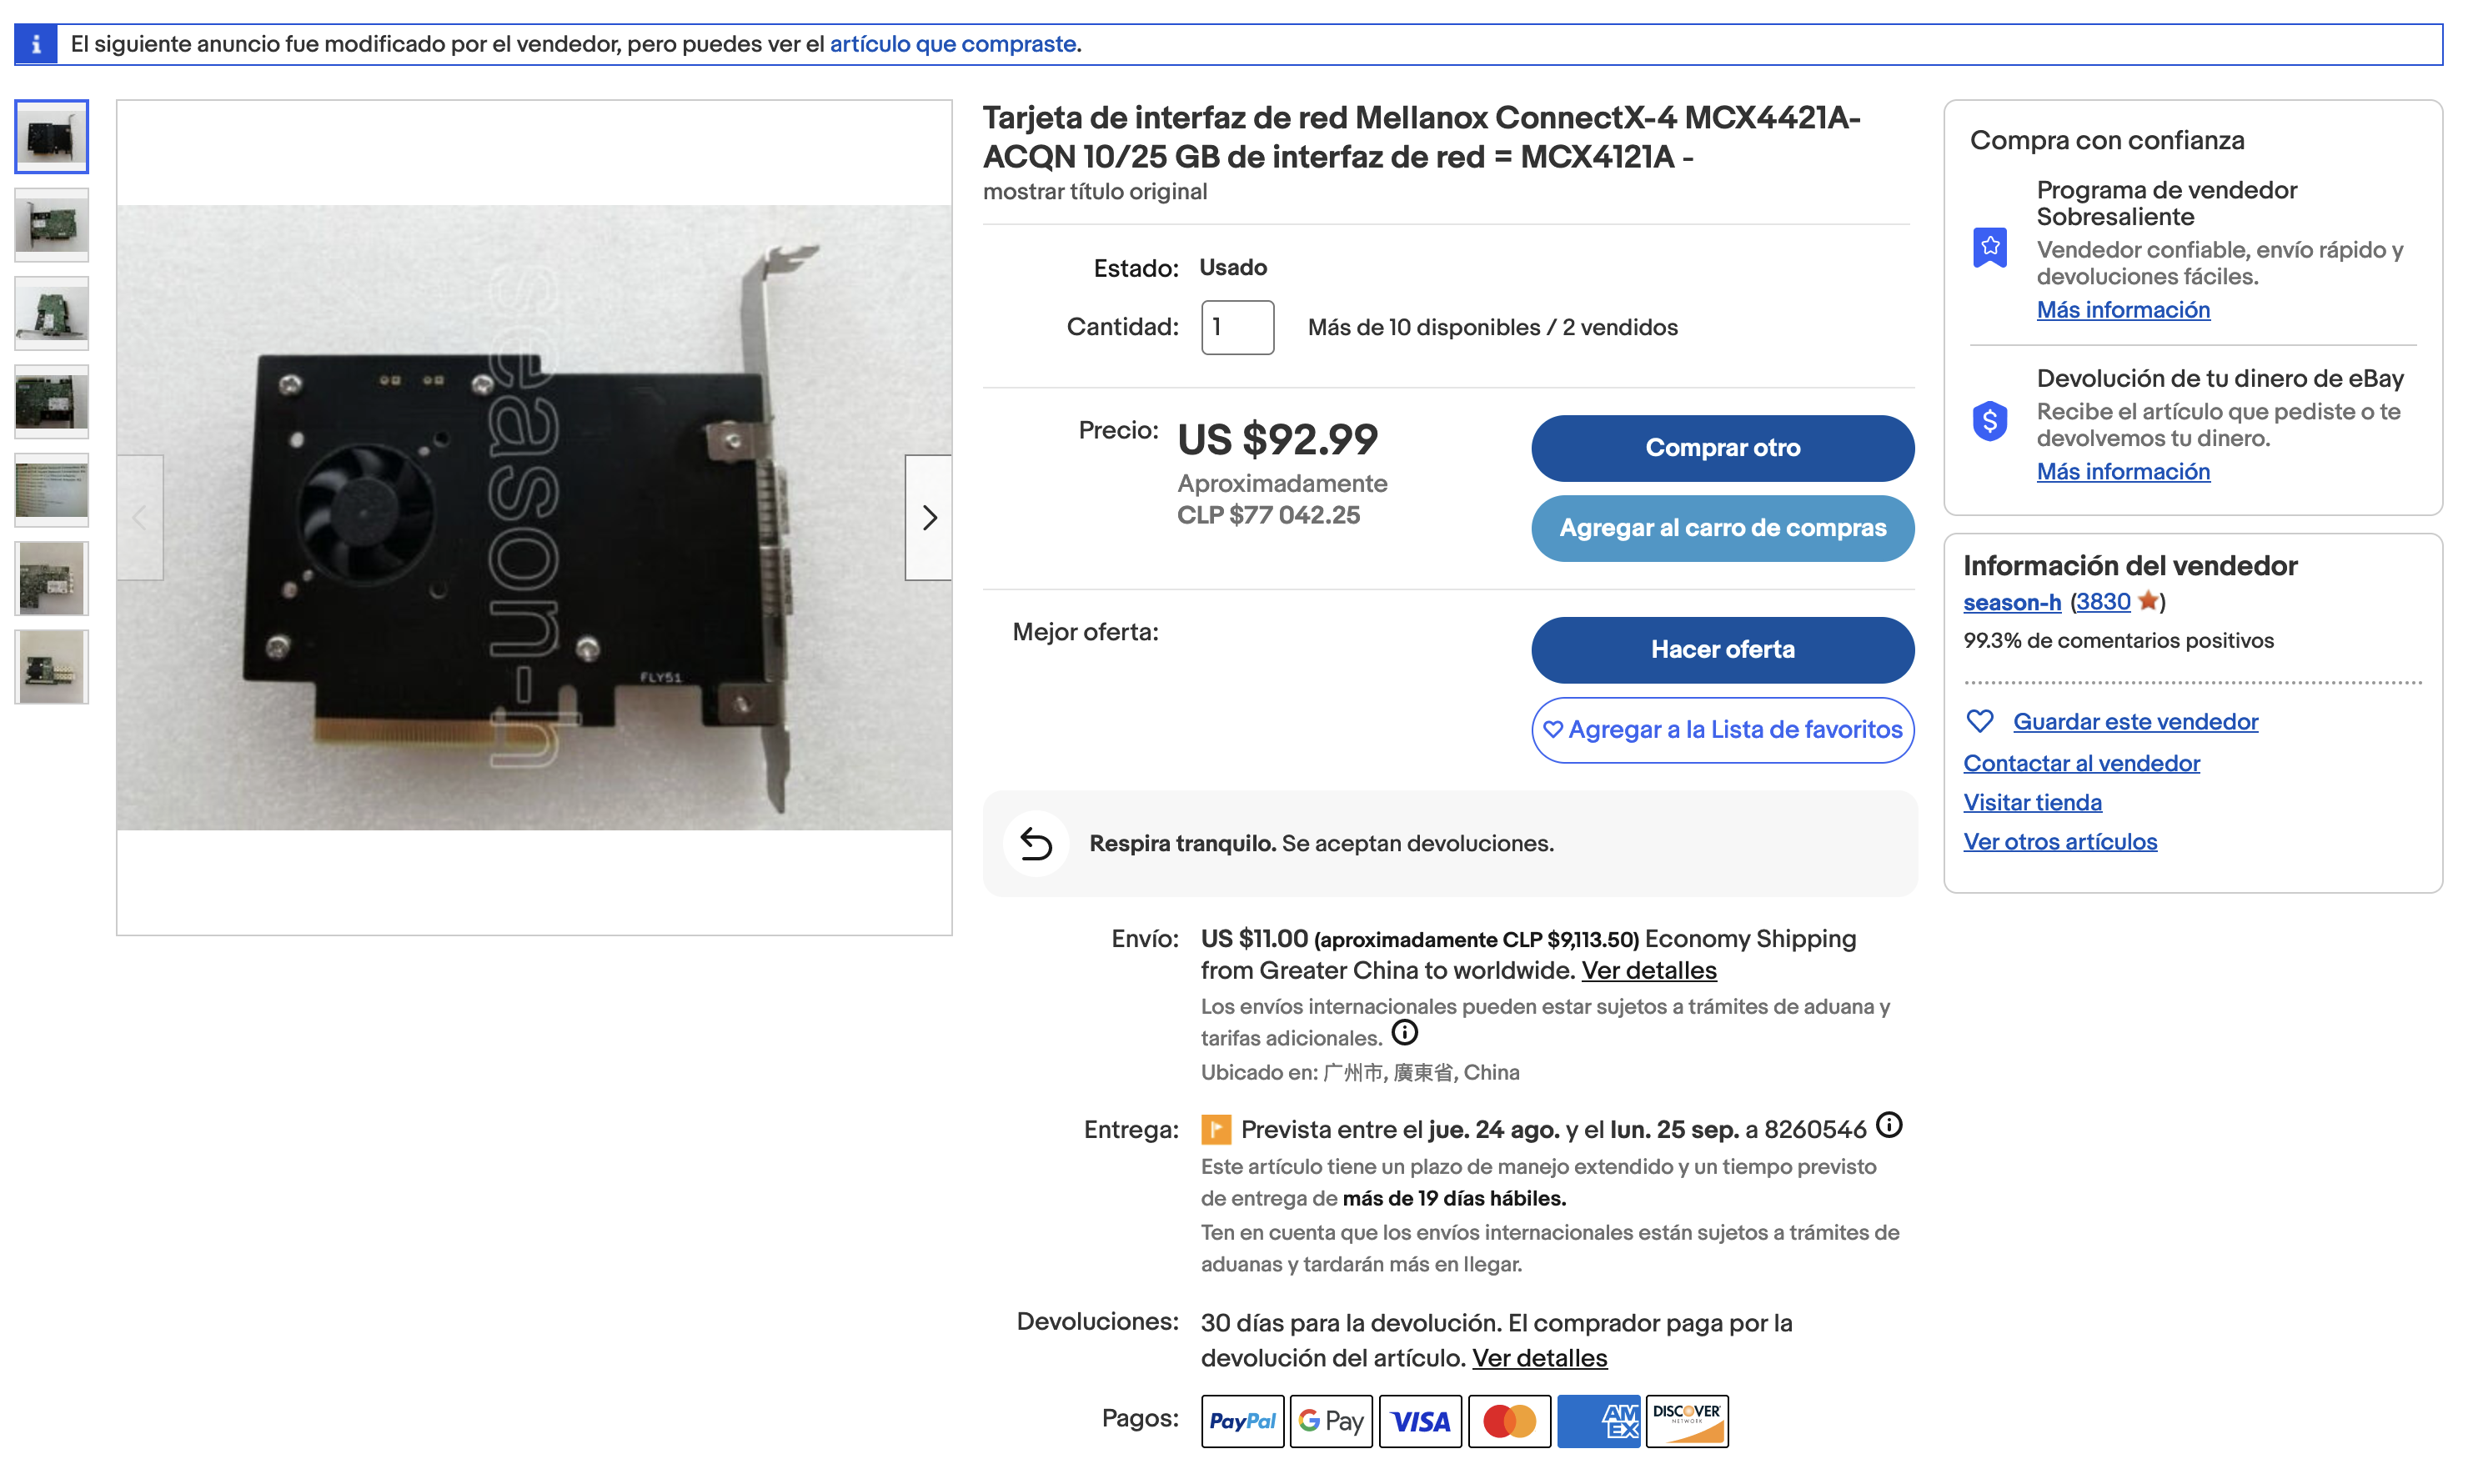
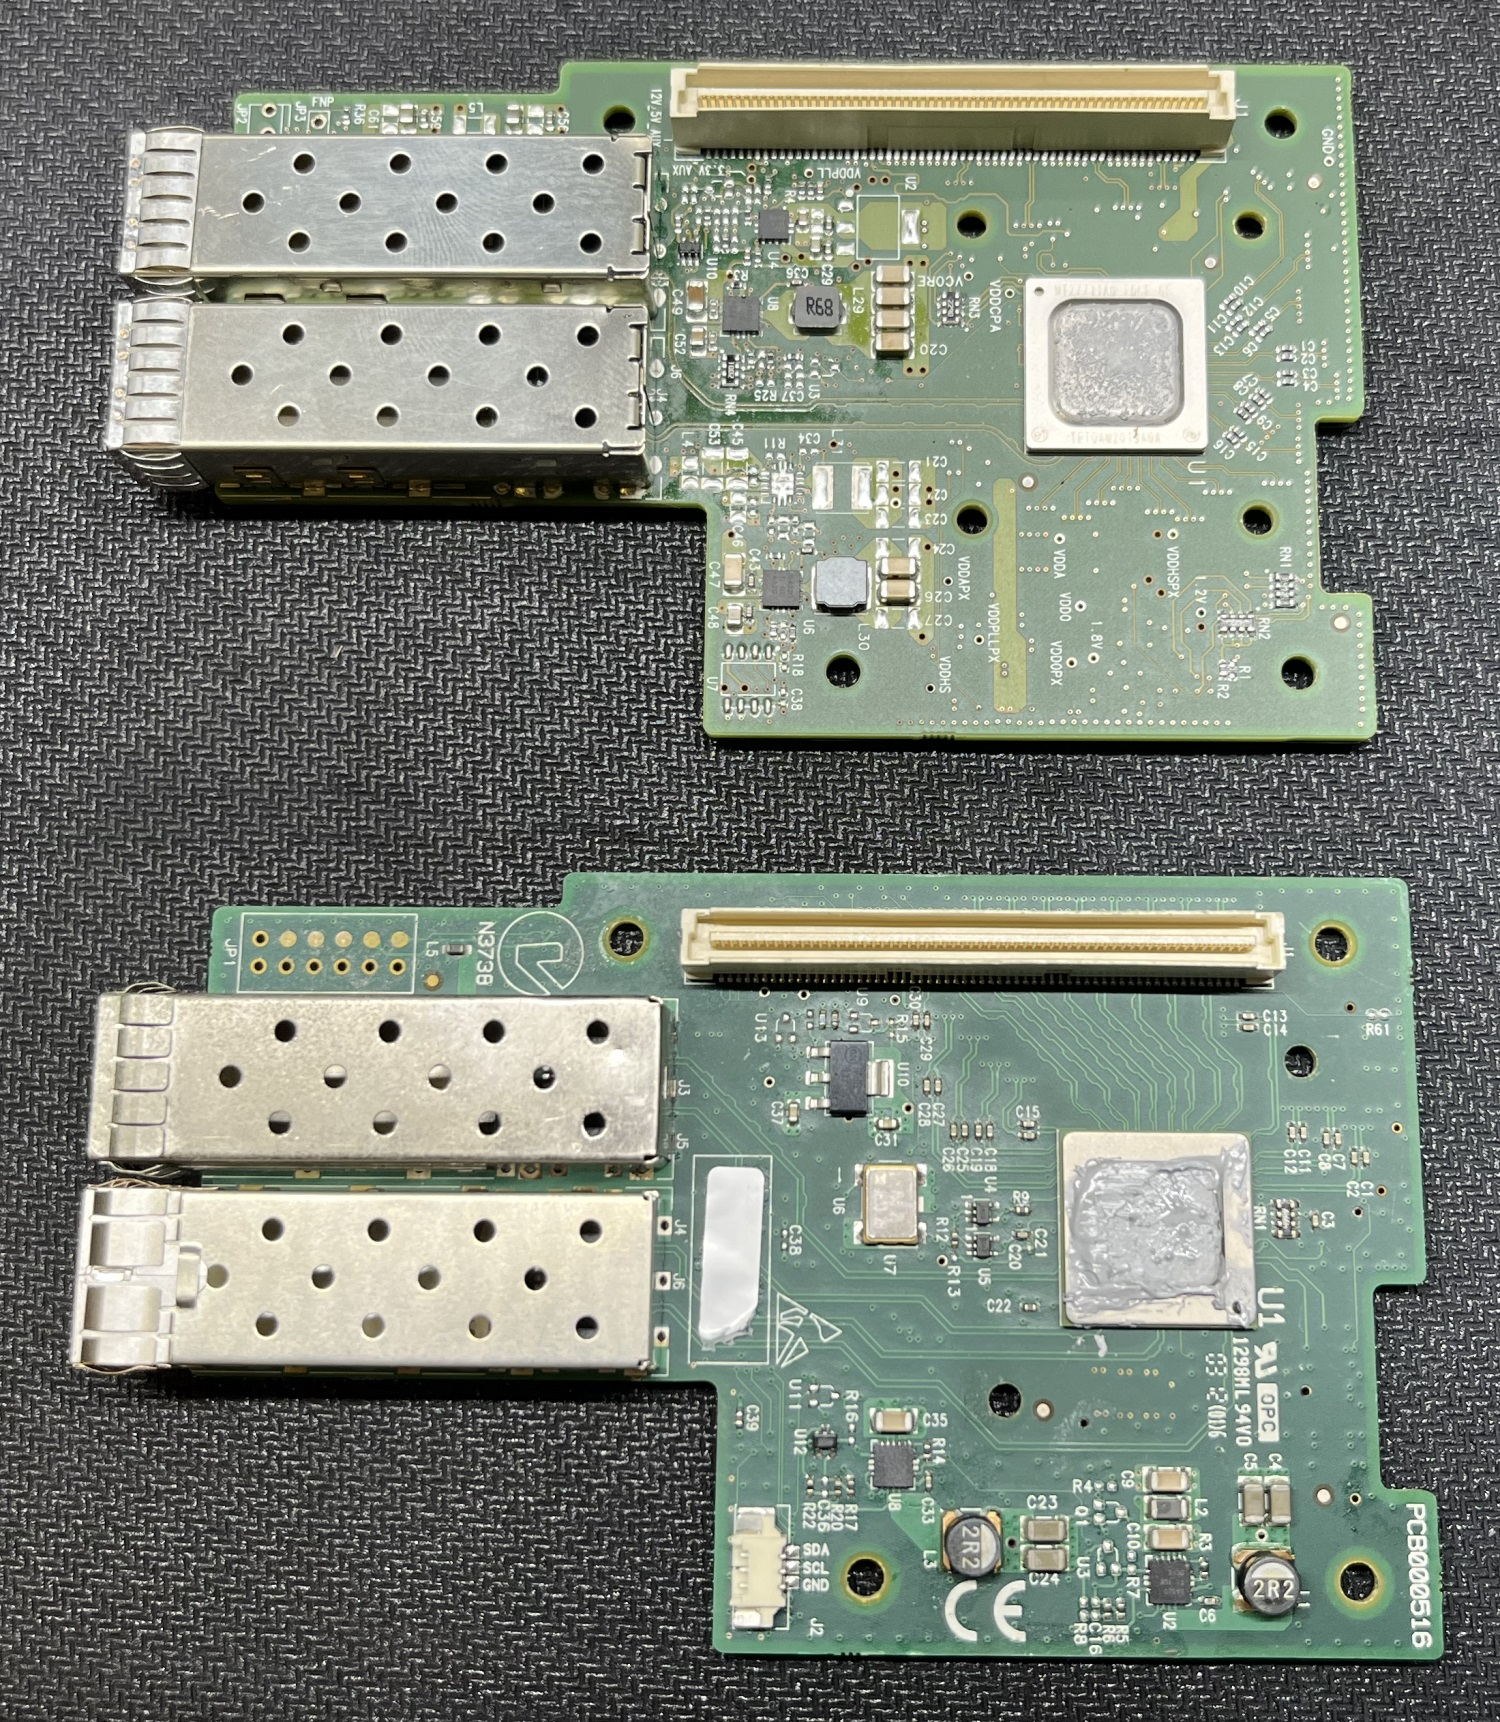
About the Mellanox ConnectX-4 MCX4421A-ACQN\
For more information about the OCP, I found this really interesting document from www.opencompute.org with a lot information.
It's important to be aware that the GW-R86S-U* models come equipped with an OCP connector, which facilitates communication via PCIe 3.0 x4 with the CX341A card. These models have been specifically designed to be a seamless fit with the CX341A card. If you're looking to replace the CX341A card, the ideal option would be the CX4421A in the version MCX4421A-ACQN.
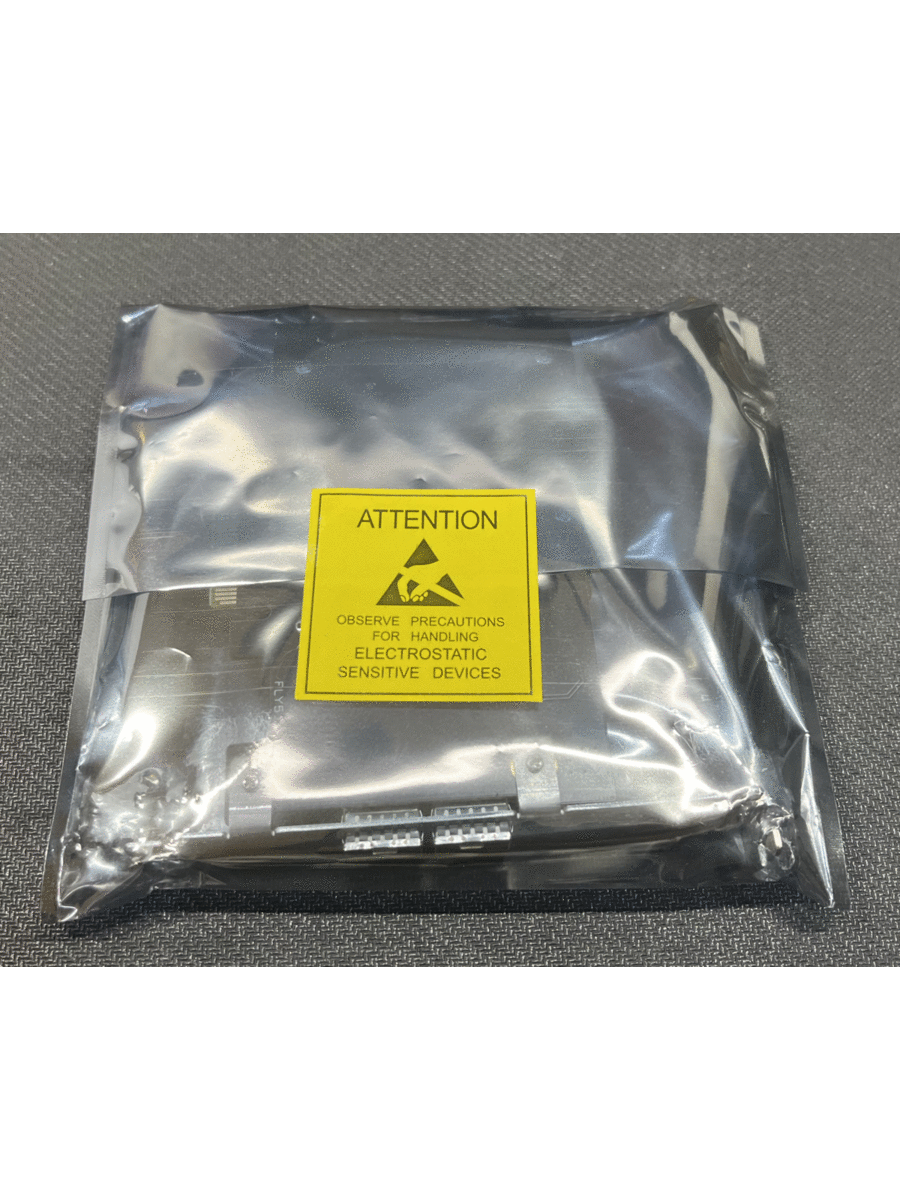
I purchased the MCX4421A-ACQN card from eBay at approximately ~$90 USD.
Prior to changing and installing the interface card, it is crucial to ensure that the card's firmware is up to date. Therefore, let's proceed with the firmware upgrade!
Upgrade firmware
You can find the official documentation for this here.
In your host do:
- Get the NVIDIA Firmware Tools (MFT) from here: https://network.nvidia.com/products/adapter-software/firmware-tools/
- As root, start the mst tools with: sudo mst start
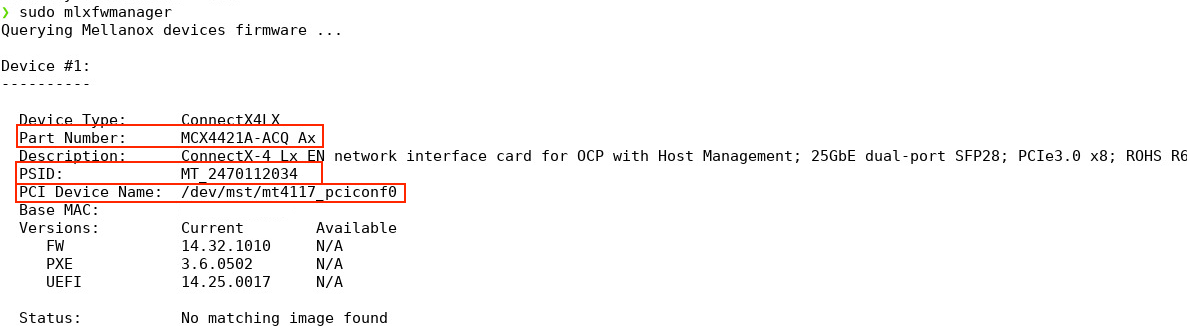
- To verify the Part Number (OPN), the PSID, and the PCI device name, execute the command: sudo mlxfwmanager.
Once you have obtained the OPN and PSID, proceed to download the official firmware for your device from the following link: https://network.nvidia.com/support/firmware/connectx4lxen/.

- After obtaining the PCI device name, proceed to burn the downloaded binary firmware using the following command: sudo mlxburn –i <fw-ConnectX-4-downloaded>.bin –d /dev/mst/<PCI-device-name>

More info about the mlxburn command here.
Change the CX341A interface card
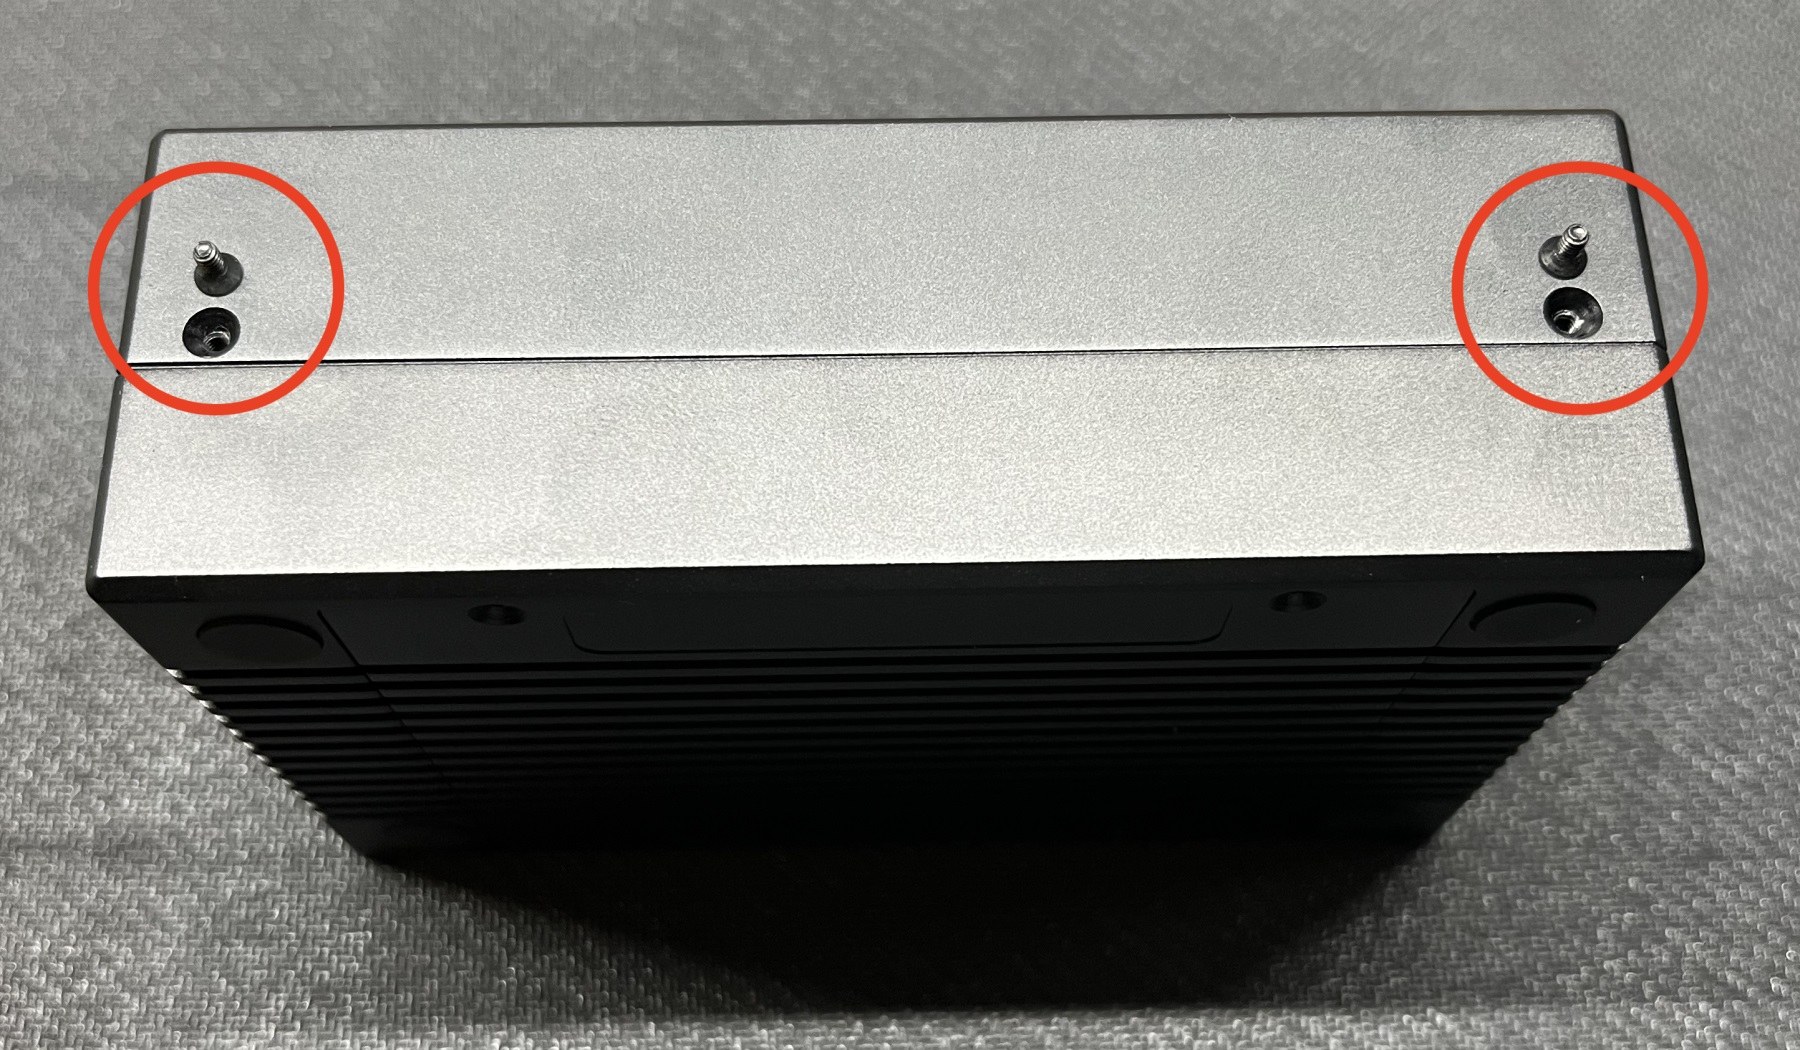
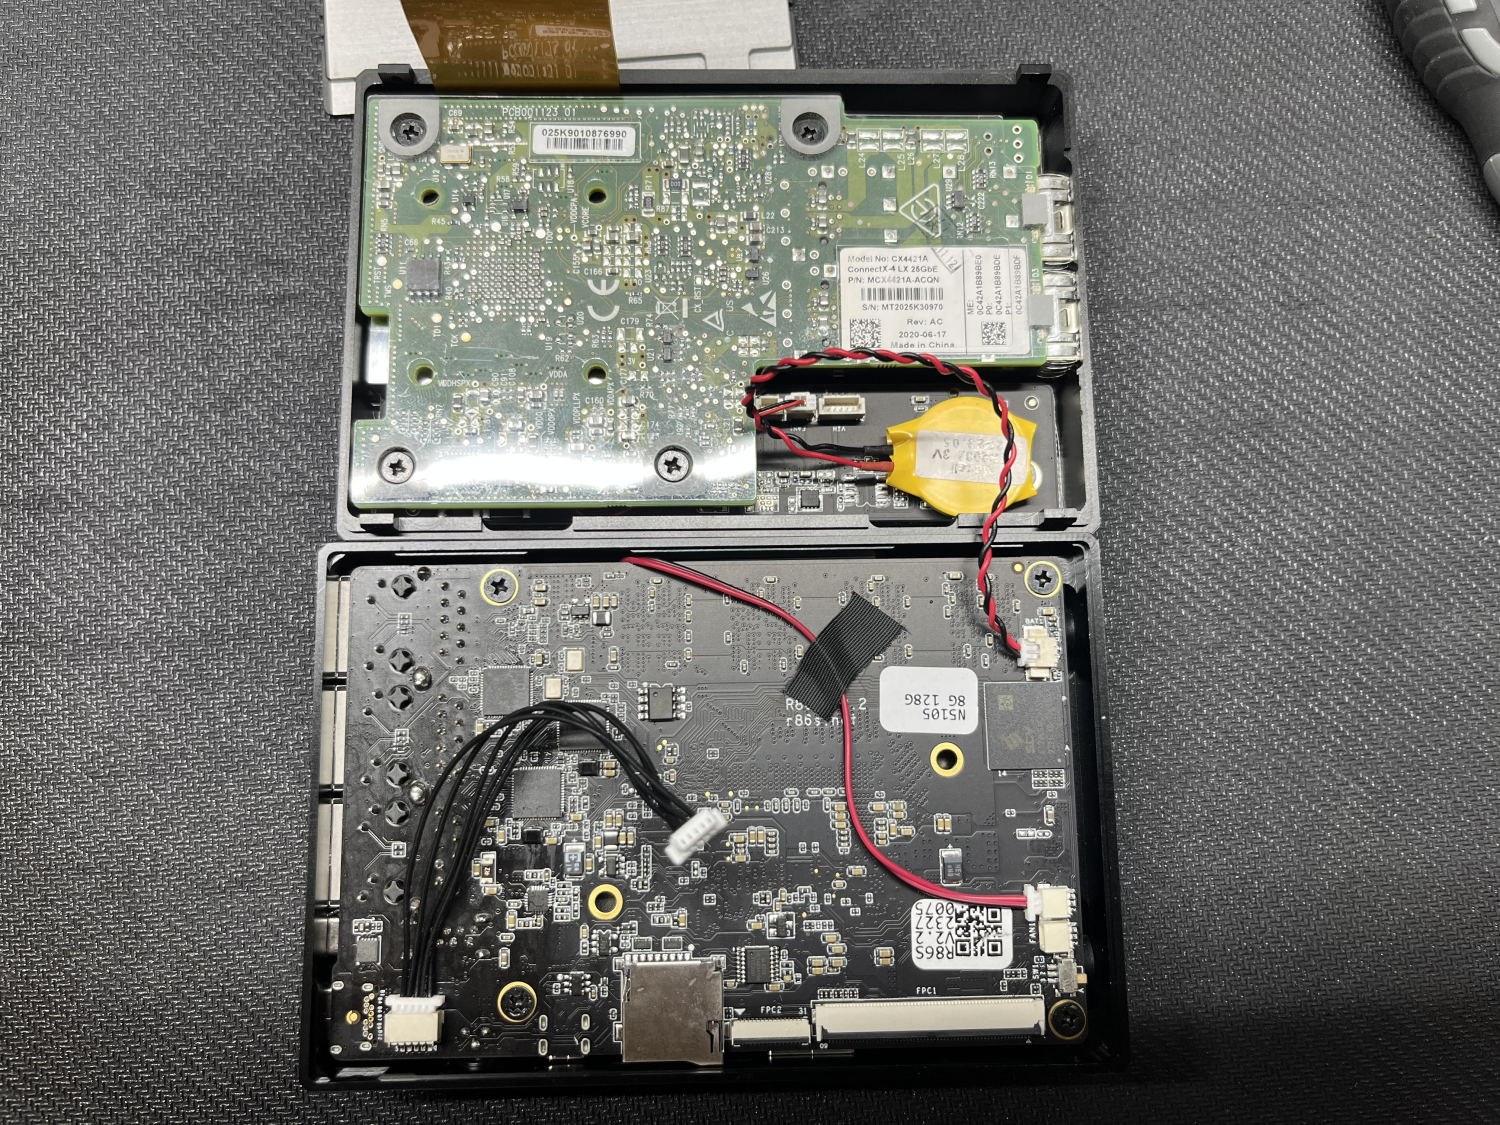
- Remove the four lateral screws.

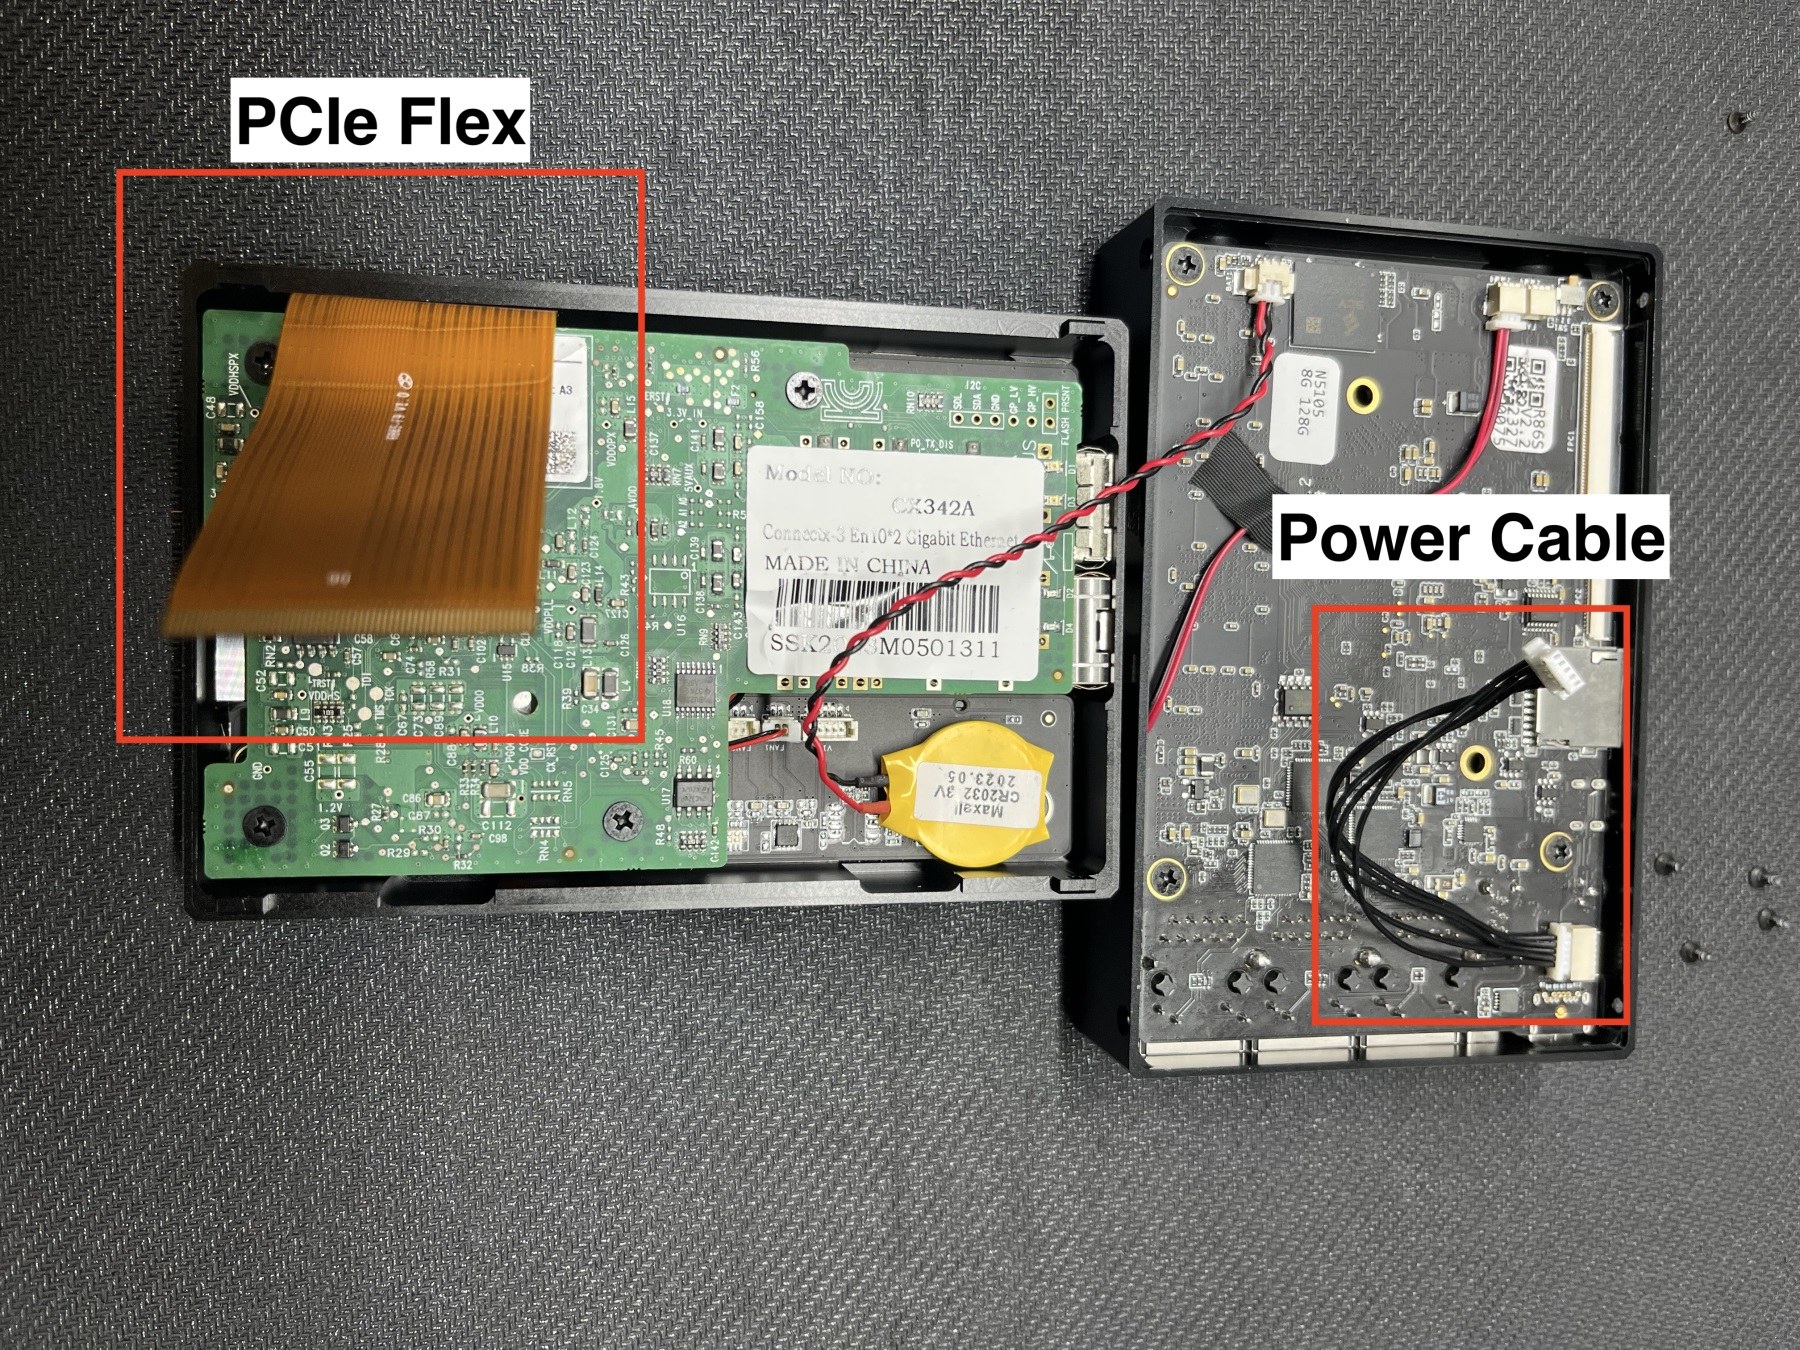
Take your time, there's no need to hurry. Start by slowly opening the case. With a Opening Tool remove the PCI flex and the power cable. DO NOT disconnect the battery cable.
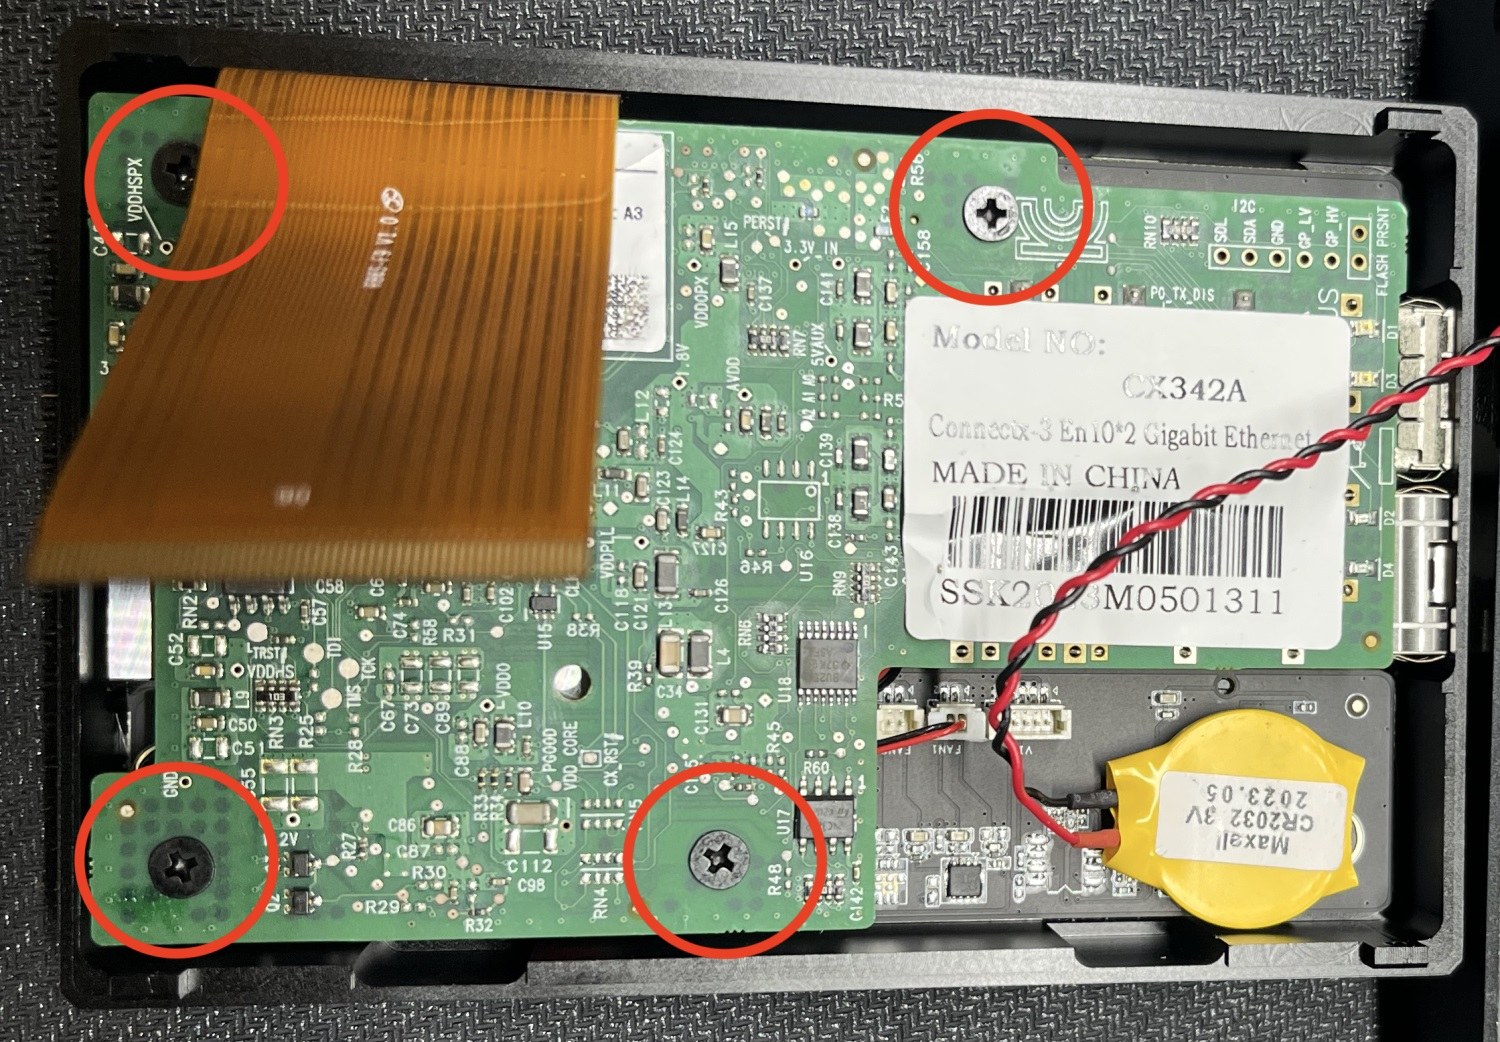
Unscrew the four screws securing the card in place. Carefully take out the card from its slot after removing the screw
-
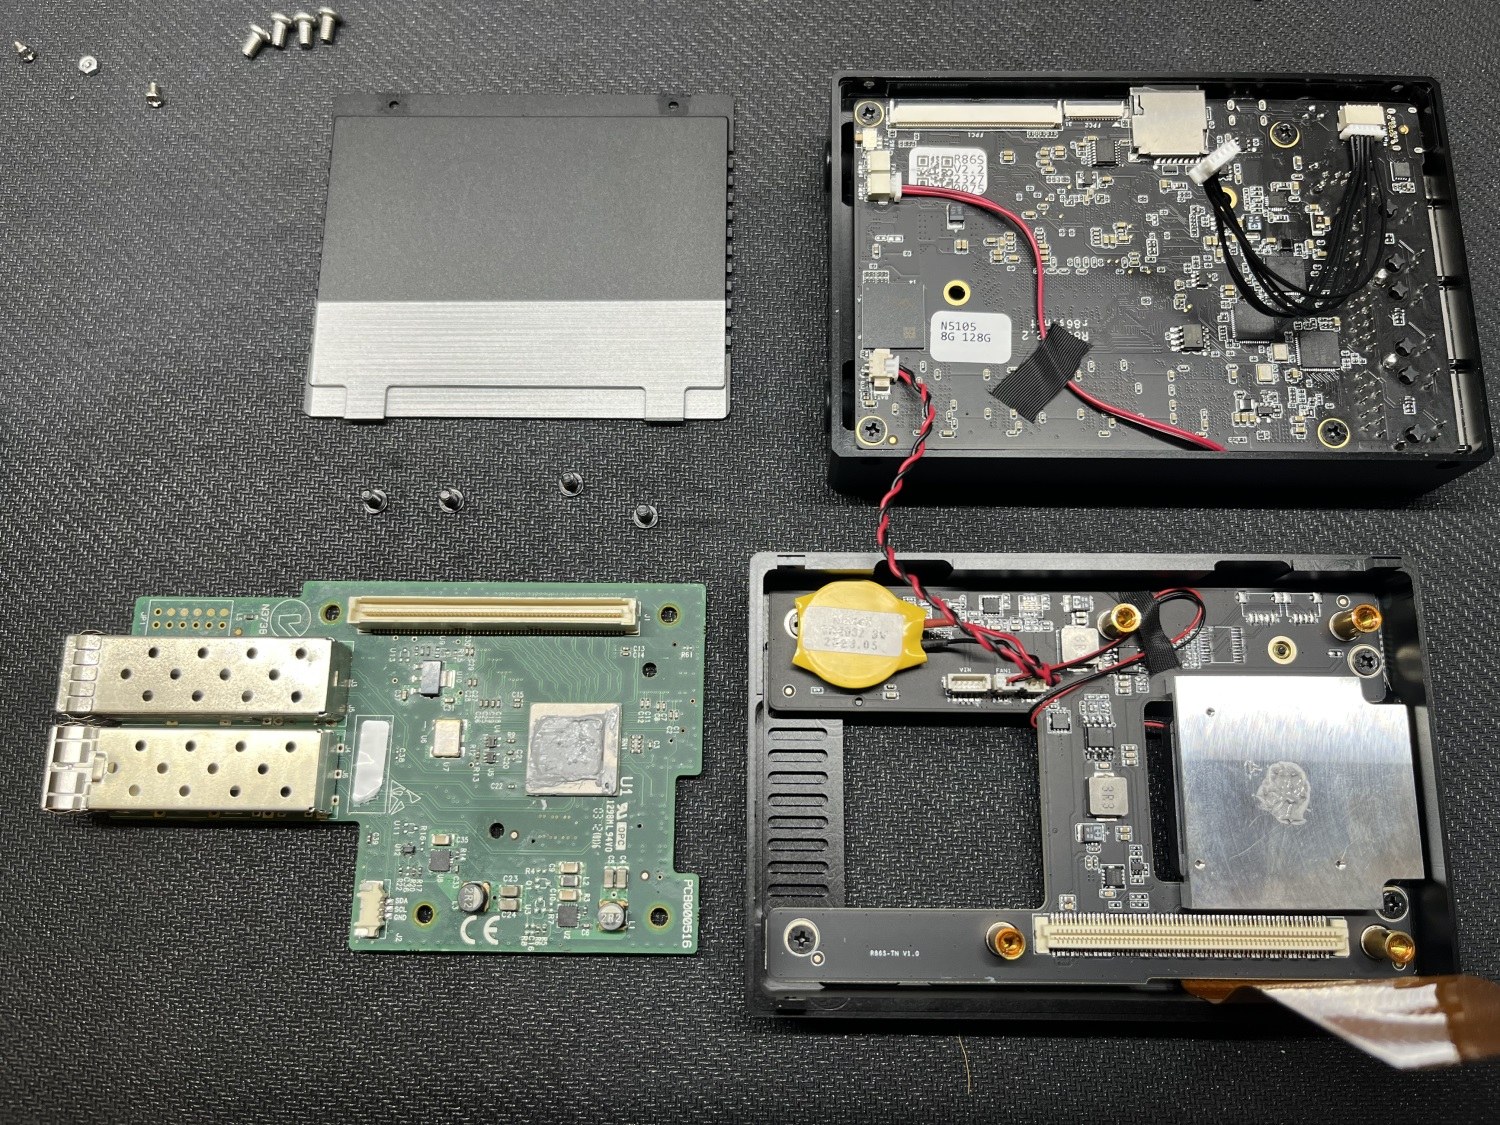
Finally you will get this:
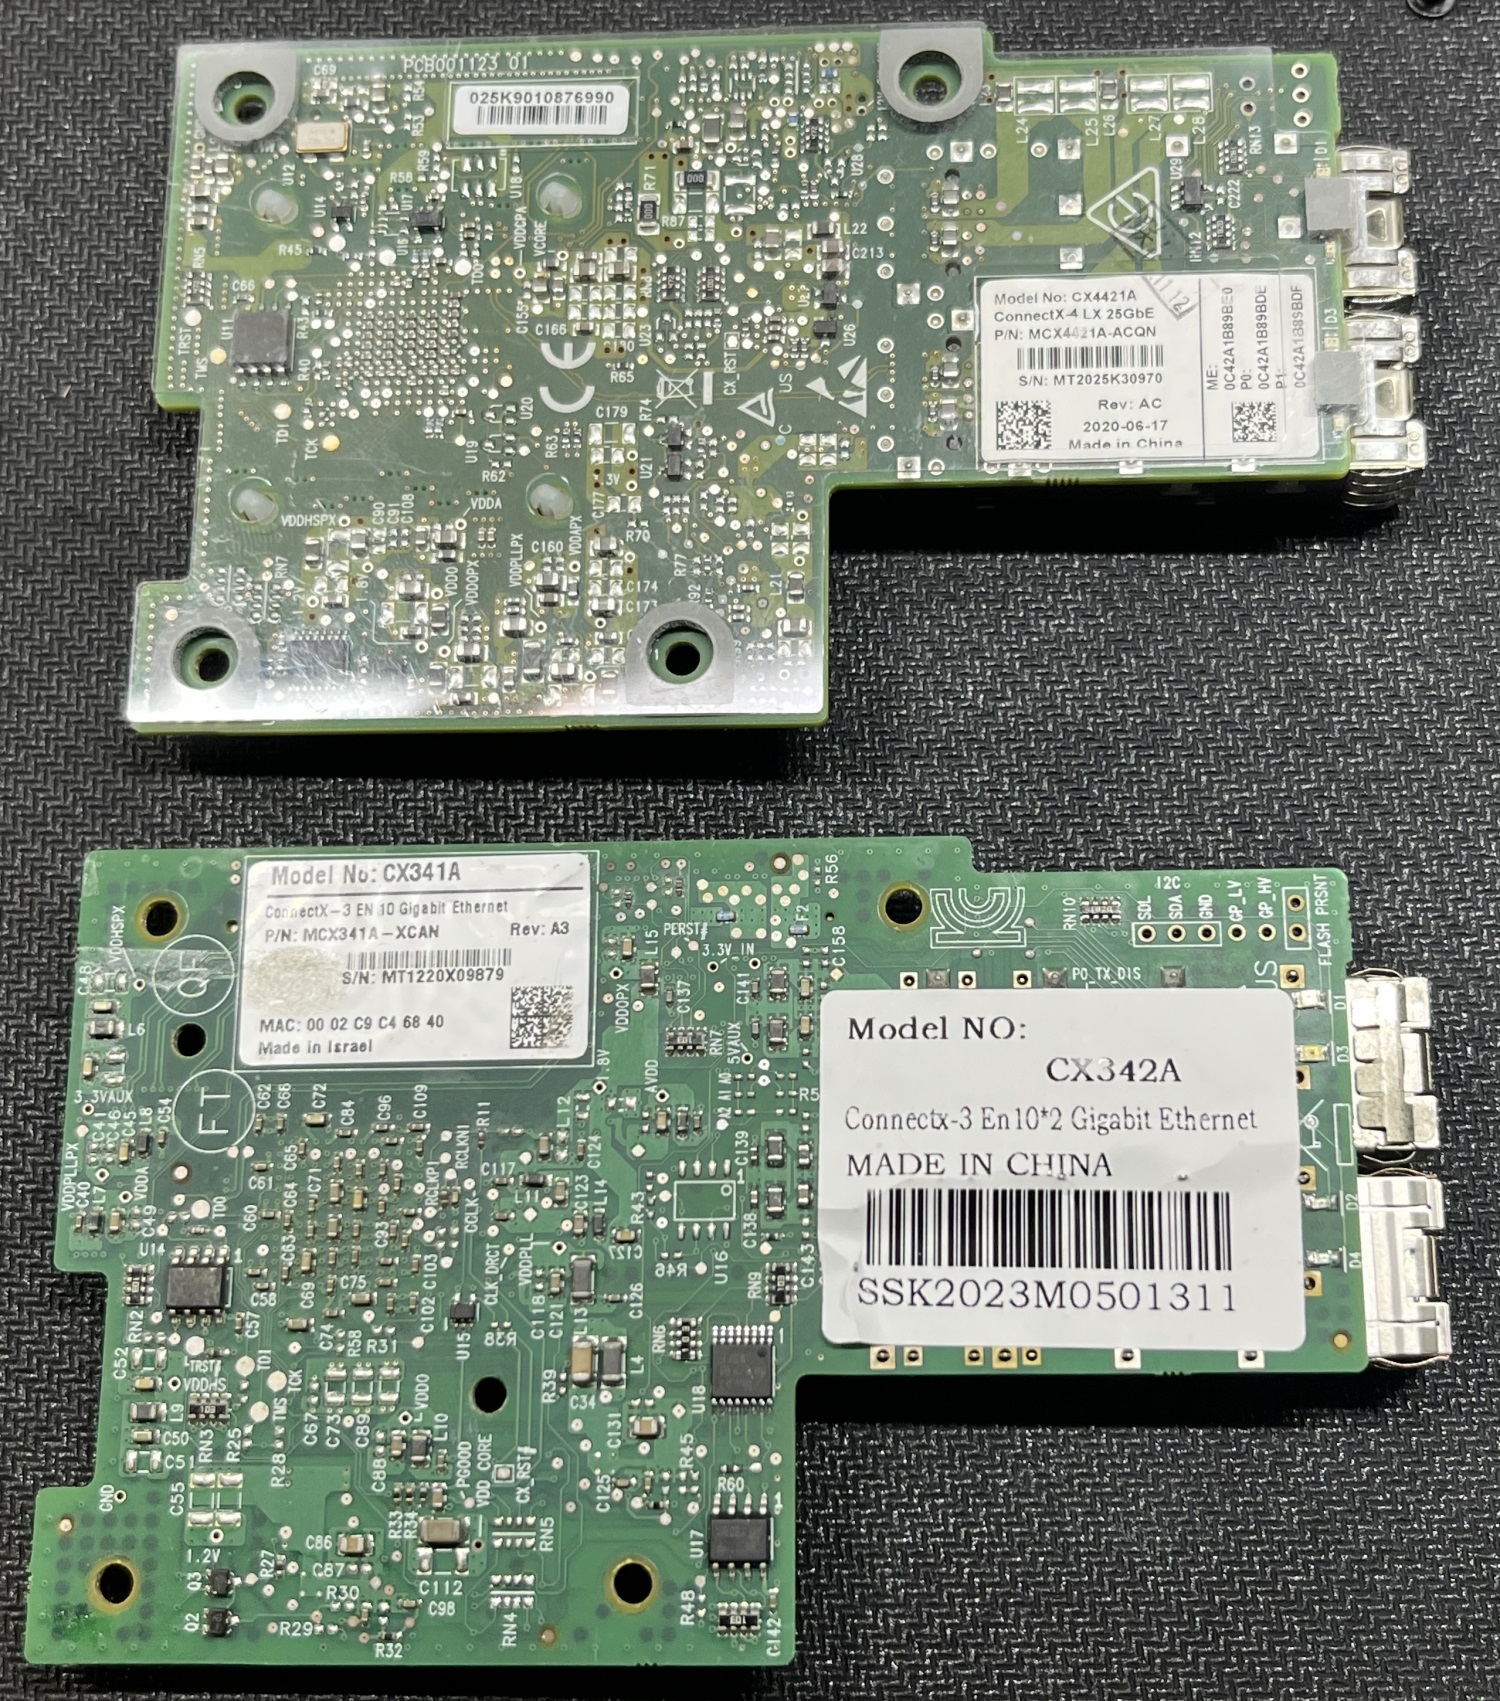
Upon comparing the cards, it becomes evident that they share identical size and form.
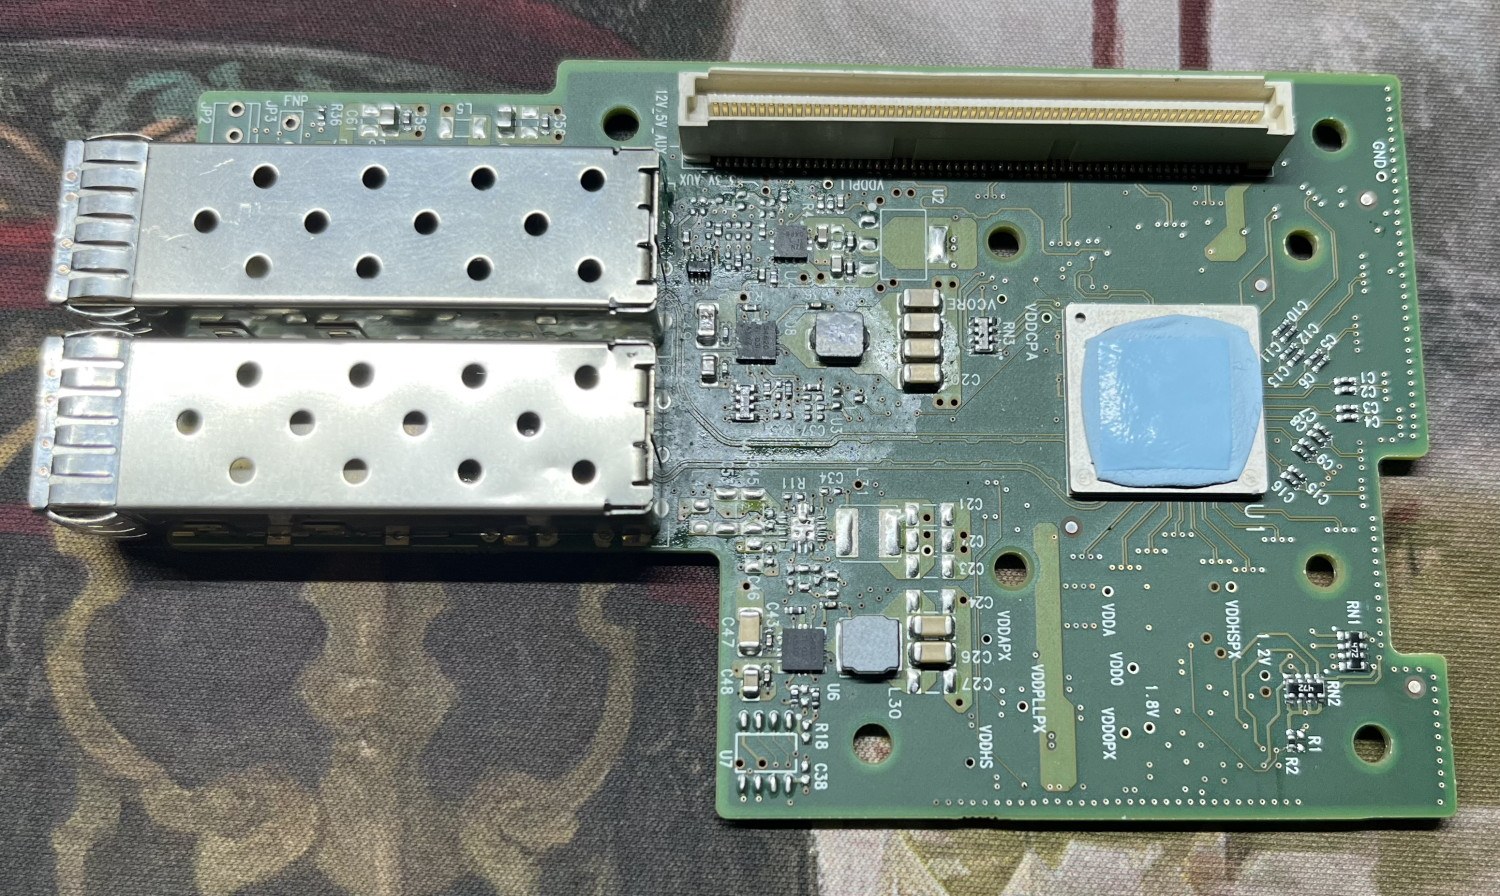
- Lastly, add a thermal pad or thermal paste, then proceed to mount the card securely by fastening the four screws. Once the card is securely in place, carefully reconnect both the PCIe flex and the power cable.
Testing
Disclaimer: This is an unfinished section.
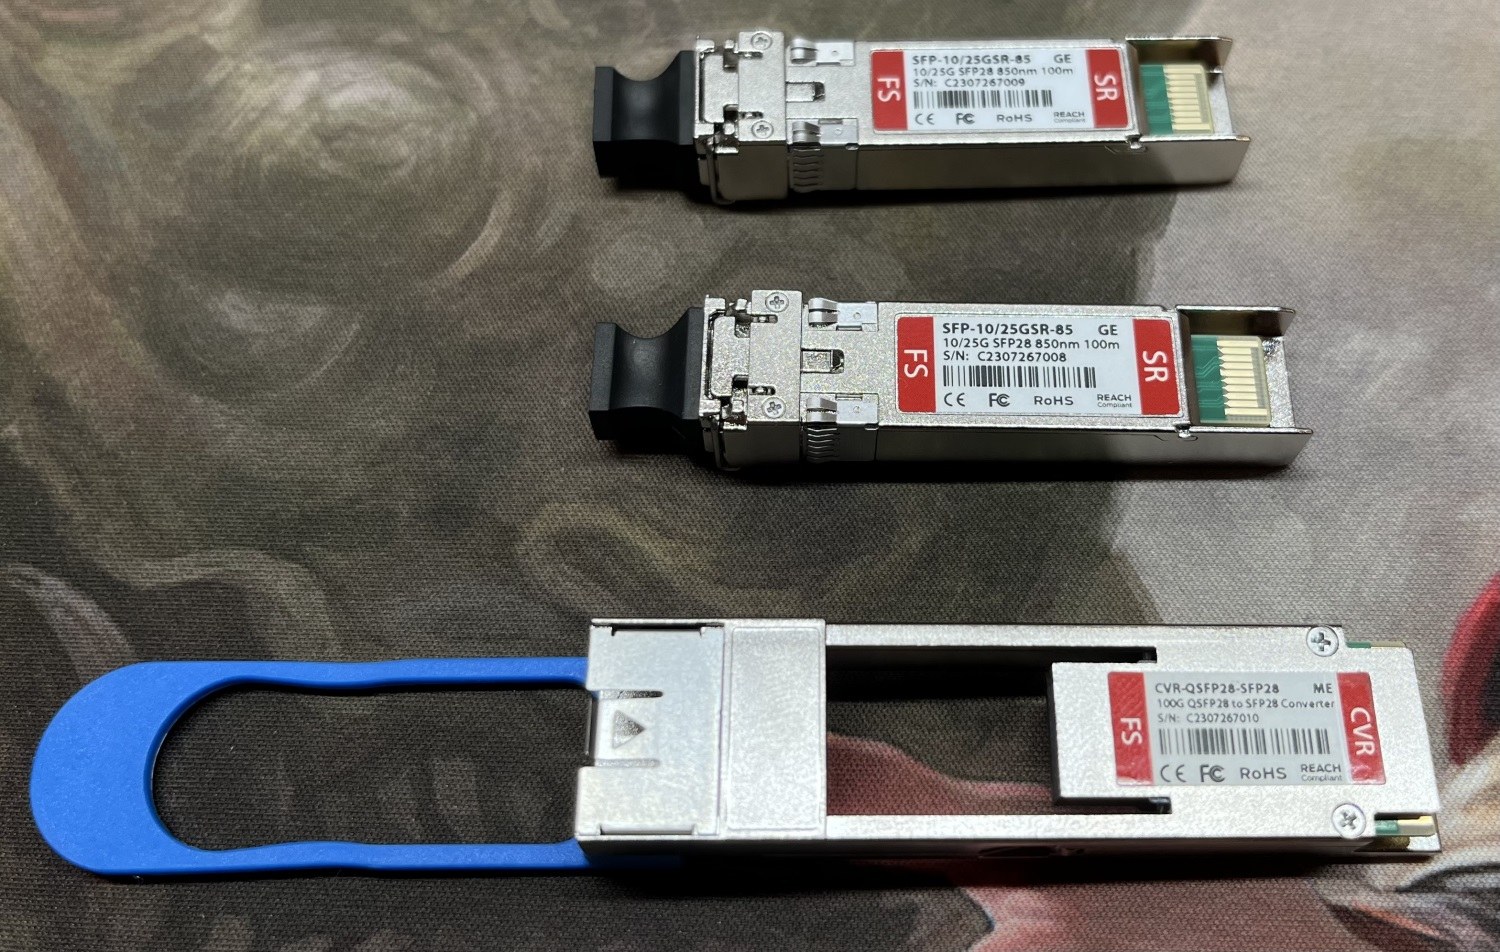
Equipment
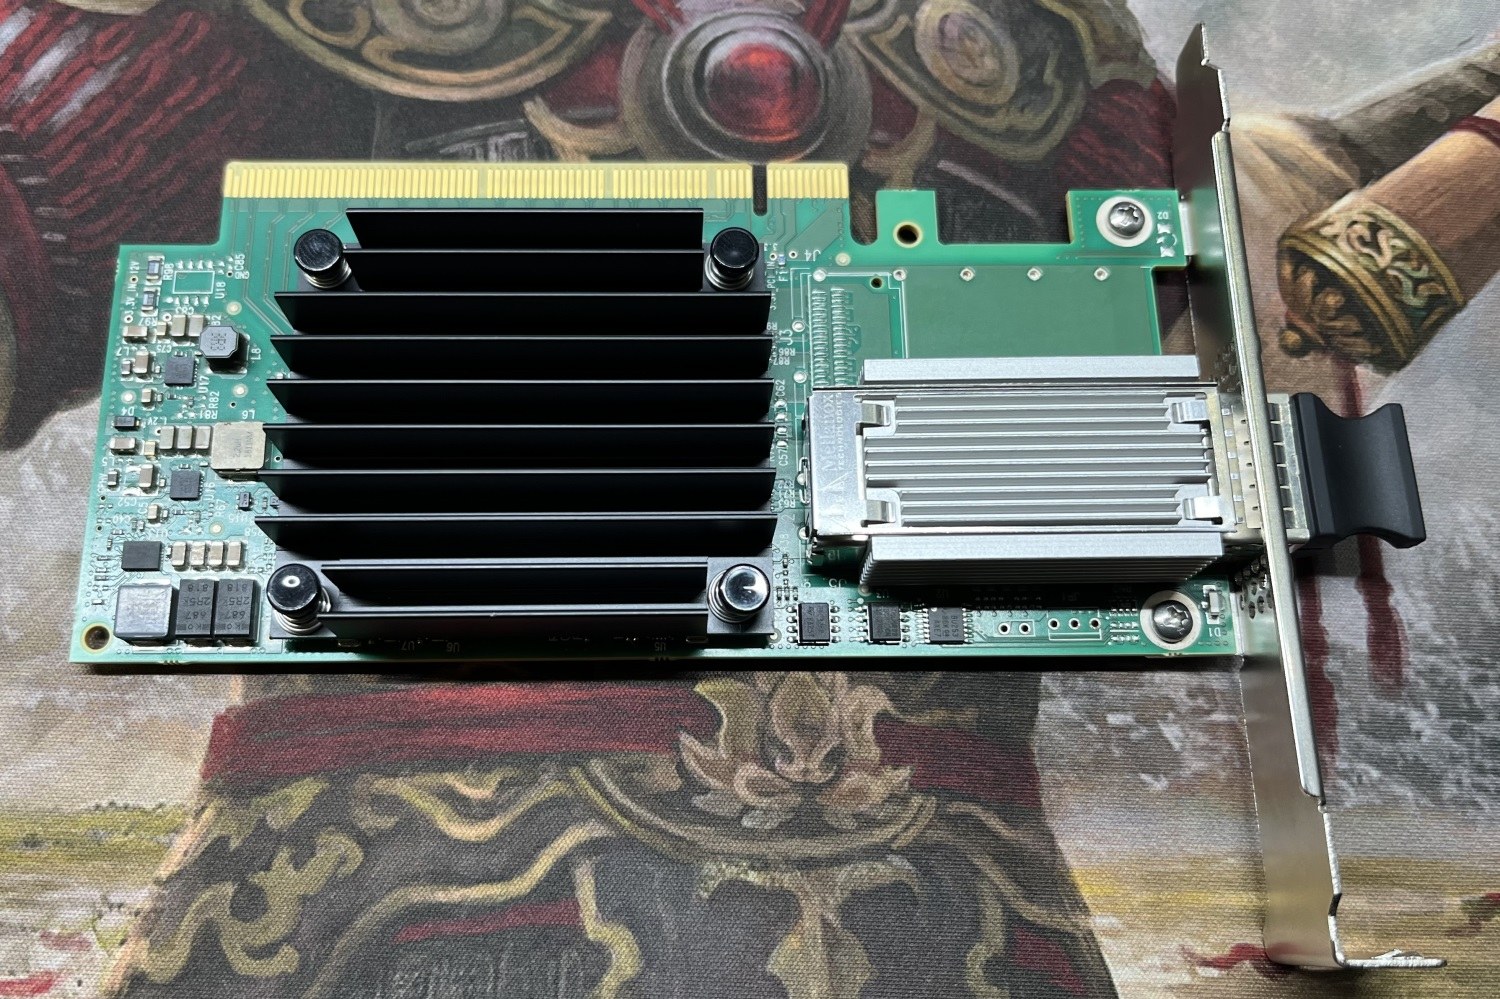
- 1x MCX455A-ECAT in my host
- 1x 1.5m (5ft) LC UPC to LC UPC Duplex OM4 Multimode
- 1x Mellanox MAM1Q00A-QSA28
- 2x Generic Compatible 10/25GBASE-SR SFP28 850nm 100m DOM Duplex LC MMF

Display the new card
Let confirm whether or not we can view the card, and provide the slot ID where the device is located.
Here the slot device have the form bus:device.function. More info about the lspci command in the man page.
root@r86s-01:~# lspci | grep -e 'Mellanox*'
04:00.0 Ethernet controller: Mellanox Technologies MT27710 Family [ConnectX-4 Lx]
04:00.1 Ethernet controller: Mellanox Technologies MT27710 Family [ConnectX-4 Lx]
The card is located in the bus ID 04, with the device number 00. Additionally, the two functions of the two interfaces have IDs 0 and 1, respectively.
About the PCIe lanes usage
It is important to note that the Intel Celeron N5105 processor is equipped with a maximum of 8 PCIe lanes. Let's investigate the distribution of the lanes around the devices. To do this, we will examine the system's topology using the lstopo command:
root@r86s-01:~# lstopo
Machine (7721MB total)
  Package L#0
    NUMANode L#0 (P#0 7721MB)
    L3 L#0 (4096KB) + L2 L#0 (1536KB)
      L1d L#0 (32KB) + L1i L#0 (32KB) + Core L#0 + PU L#0 (P#0)
      L1d L#1 (32KB) + L1i L#1 (32KB) + Core L#1 + PU L#1 (P#1)
      L1d L#2 (32KB) + L1i L#2 (32KB) + Core L#2 + PU L#2 (P#2)
      L1d L#3 (32KB) + L1i L#3 (32KB) + Core L#3 + PU L#3 (P#3)
  HostBridge
    PCI 00:02.0 (VGA)
    PCIBridge
      PCI 01:00.0 (Ethernet)
        Net "enp1s0"
    PCIBridge
      PCI 02:00.0 (Ethernet)
        Net "enp2s0"
    PCIBridge
      PCI 03:00.0 (Ethernet)
        Net "enp3s0"
    PCIBridge
      PCI 04:00.0 (Ethernet)
        Net "enp4s0f0np0"
        OpenFabrics "mlx5_0"
      PCI 04:00.1 (Ethernet)
        Net "enp4s0f1np1"
        OpenFabrics "mlx5_1"
    Block "mmcblk0"
    Block "mmcblk0boot0"
    Block "mmcblk0boot1"
  Misc(MemoryModule)
  Misc(MemoryModule)
Here, we can confirm that the distribution of the PCIe lanes is concentrated around buses 00, 01, 02, 03, and 04. Among these lanes, the most crucial one is bus 04 as it houses our MCX4421A card. However, it's essential to consider the other lanes as well. Let's take a closer look at the PCIe configuration:
root@r86s-01:~# lspci -s 01:00.0 -vvv | grep Width
        LnkCap: Port #0, Speed 5GT/s, Width x1, ASPM L1, Exit Latency L1 <4us
        LnkSta: Speed 5GT/s, Width x1
root@r86s-01:~# lspci -s 02:00.0 -vvv | grep Width
        LnkCap: Port #0, Speed 5GT/s, Width x1, ASPM L1, Exit Latency L1 <4us
        LnkSta: Speed 5GT/s, Width x1
root@r86s-01:~# lspci -s 03:00.0 -vvv | grep Width
        LnkCap: Port #0, Speed 5GT/s, Width x1, ASPM L1, Exit Latency L1 <4us
        LnkSta: Speed 5GT/s, Width x1
Upon further investigation, we have confirmed that our Intel Ethernet Controller I226-V card operates using x1 lanes for each interface. This information aligns perfectly with the details provided in the Intel datasheet. Specifically, for each individual port, the Speed & Slot Width is specified as 5G, x1.
Now, let see what happen with the MCX4421A card:
root@r86s-01:~# lspci -s 04:00.0 -vvv | grep Width
        LnkCap: Port #0, Speed 8GT/s, Width x8, ASPM L1, Exit Latency L1 <4us
        LnkSta: Speed 8GT/s, Width x4 (downgraded)
root@r86s-01:~# lspci -s 04:00.1 -vvv | grep Width
        LnkCap: Port #0, Speed 8GT/s, Width x8, ASPM L1, Exit Latency L1 <4us
        LnkSta: Speed 8GT/s, Width x4 (downgraded)
The key and critical confirmation here is that the MCX4421A is currently utilizing a width of x4 lanes. This translates to a significant throughput of 3.938 GB/s, which is equivalent to 31.504 Gbps at the physical layer. However, it is crucial to note that we cannot fully utilize the complete data transfer rate offered by the 8x lanes default configuration of the card.
If you want to know more about the performance of the PCIe lanes and the NICs, I highly recommend you the paper Understanding PCIe performance for end host networking.
Experiments
- I installed Debian 12 in the nodes (my workstation and in the R86S device).
- I didn't install the NVIDIA MLNX_OFED driver in either of the nodes.
- I set the MTU in 9000 in both interface nodes (workstation and R86S)
Test 1: iperf
I used iperf version 2.0.14a, and not iperf3, according to the official documentation of performance measure from Nvidia.
In my workstation I run:
iperf -s -P8
------------------------------------------------------------
Server listening on TCP port 5001
TCP window size:  128 KByte (default)
------------------------------------------------------------
[  4] local 10.10.0.1 port 5001 connected with 10.10.0.2 port 33252
[  5] local 10.10.0.1 port 5001 connected with 10.10.0.2 port 33236
[  6] local 10.10.0.1 port 5001 connected with 10.10.0.2 port 33254
[  7] local 10.10.0.1 port 5001 connected with 10.10.0.2 port 33214
[  8] local 10.10.0.1 port 5001 connected with 10.10.0.2 port 33220
[  9] local 10.10.0.1 port 5001 connected with 10.10.0.2 port 33266
[ 10] local 10.10.0.1 port 5001 connected with 10.10.0.2 port 33274
[ 11] local 10.10.0.1 port 5001 connected with 10.10.0.2 port 33290
[ ID] Interval       Transfer     Bandwidth
[ 11] 0.0000-9.9992 sec  9.60 GBytes  8.24 Gbits/sec
[  5] 0.0000-10.0065 sec  2.37 GBytes  2.03 Gbits/sec
[  7] 0.0000-10.0062 sec  2.39 GBytes  2.05 Gbits/sec
[  9] 0.0000-10.0034 sec  3.15 GBytes  2.71 Gbits/sec
[  4] 0.0000-10.0103 sec  3.25 GBytes  2.79 Gbits/sec
[  6] 0.0000-10.0065 sec  2.43 GBytes  2.09 Gbits/sec
[ 10] 0.0000-10.0045 sec  2.43 GBytes  2.09 Gbits/sec
[  8] 0.0000-10.0036 sec  3.21 GBytes  2.76 Gbits/sec
[SUM] 0.0000-10.0091 sec  28.8 GBytes  24.7 Gbits/sec
In the R86S I run:
root@r86s-01:~# iperf -c 10.10.0.1 -P8
------------------------------------------------------------
Client connecting to 10.10.0.1, TCP port 5001
TCP window size: 16.0 KByte (default)
------------------------------------------------------------
[  7] local 10.10.0.2 port 33254 connected with 10.10.0.1 port 5001 (icwnd/mss/irtt=87/8948/32)
[  8] local 10.10.0.2 port 33266 connected with 10.10.0.1 port 5001 (icwnd/mss/irtt=87/8948/60)
[  2] local 10.10.0.2 port 33214 connected with 10.10.0.1 port 5001 (icwnd/mss/irtt=87/8948/337)
[  1] local 10.10.0.2 port 33220 connected with 10.10.0.1 port 5001 (icwnd/mss/irtt=87/8948/335)
[  3] local 10.10.0.2 port 33252 connected with 10.10.0.1 port 5001 (icwnd/mss/irtt=87/8948/70)
[  4] local 10.10.0.2 port 33236 connected with 10.10.0.1 port 5001 (icwnd/mss/irtt=87/8948/86)
[  5] local 10.10.0.2 port 33274 connected with 10.10.0.1 port 5001 (icwnd/mss/irtt=87/8948/58)
[  6] local 10.10.0.2 port 33290 connected with 10.10.0.1 port 5001 (icwnd/mss/irtt=87/8948/66)
[ ID] Interval       Transfer     Bandwidth
[  1] 0.0000-10.0184 sec  3.21 GBytes  2.75 Gbits/sec
[  8] 0.0000-10.0179 sec  3.15 GBytes  2.70 Gbits/sec
[  2] 0.0000-10.0171 sec  2.39 GBytes  2.05 Gbits/sec
[  4] 0.0000-10.0165 sec  2.37 GBytes  2.03 Gbits/sec
[  6] 0.0000-10.0183 sec  9.60 GBytes  8.23 Gbits/sec
[  5] 0.0000-10.0173 sec  2.43 GBytes  2.08 Gbits/sec
[  3] 0.0000-10.0161 sec  3.25 GBytes  2.79 Gbits/sec
[  7] 0.0000-10.0172 sec  2.43 GBytes  2.08 Gbits/sec
[SUM] 0.0000-10.0049 sec  28.8 GBytes  24.8 Gbits/sec
Test 2: qperf
Run the qperf server (in my case, the workstation):
$ qperfBandwidth
Run the qperf client in the R86S device and get the throughput result:
root@r86s-01:~# qperf -ip 19766 -t 60 --use_bits_per_sec  10.10.0.1 tcp_bw
tcp_bw:
    bw  =  13.8 Gb/sec
Latency
Run the qperf client test in the R86S device and get the latency value:
root@r86s-01:~# qperf -vvs 10.10.0.1 tcp_lat
tcp_lat:
    latency         =      16 us
    msg_rate        =    62.5 K/sec
    loc_send_bytes  =    62.5 KB
    loc_recv_bytes  =    62.5 KB
    loc_send_msgs   =  62,478
    loc_recv_msgs   =  62,477
    rem_send_bytes  =    62.5 KB
    rem_recv_bytes  =    62.5 KB
    rem_send_msgs   =  62,478
    rem_recv_msgs   =  62,478